Self-made Miniature Horse Pack Saddle

Miniature Horse Talk Forums

Help Support Miniature Horse Talk Forums:

This site may earn a commission from merchant affiliate links, including eBay, Amazon, and others.

Northwolf

Well-Known Member
Joined
Mar 28, 2017
Messages
303
Reaction score
519
Location
Switzerland
I'm not sure if I'm in the right topic...

As asked in this thread http://www.miniaturehorsetalk.com/index.php/topic/138054-shetlands-capable-of-being-trail-companion/ how to use shetlands or other miniature horses as a pack animal on trails, I wanted to share my self-made pack saddle idea with you.

First, I think there are a lot of possibilities packing some stuff on a miniature horses back. It might have companies who sell pack saddles especially for minis. My first pack saddle was a kind of a goat pack saddle, but it doesn't fit well.

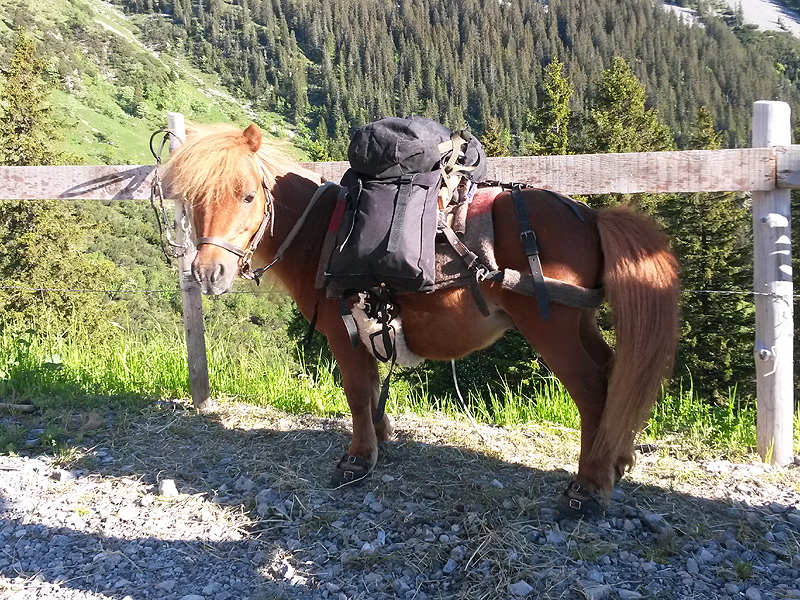
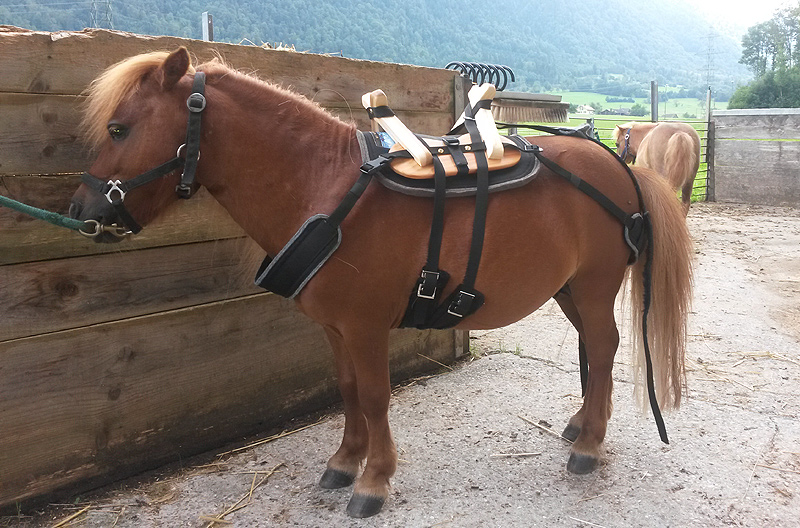
The goat saddle:
20140725_155015.jpg


It looked pretty good with the goat saddle (the company made this saddle in a customized version for miniature horses), but he had pressure points after using it 2-3 times.

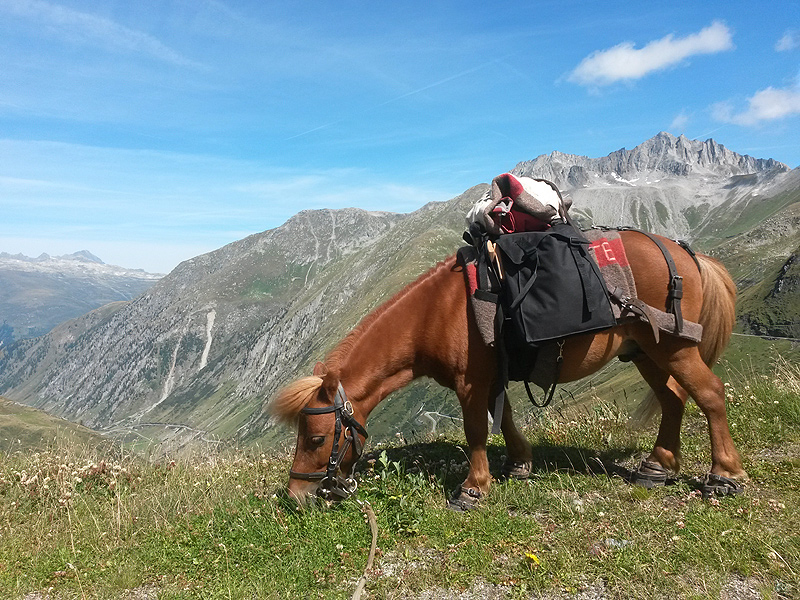
So we considered how to build a saddle on our own that fits really perfect. It should be good enough for my mini (32") to carry up to 20 pounds on an alpine route (2015, we did a longer hiking over the swiss alps down to Italy).

We got inspiration by the swiss army pack saddle, who is fully adjustable and can be customized to almost all types of horses. This is an important benefit when you make longer hikes, because horses can lose some weight during the hike.

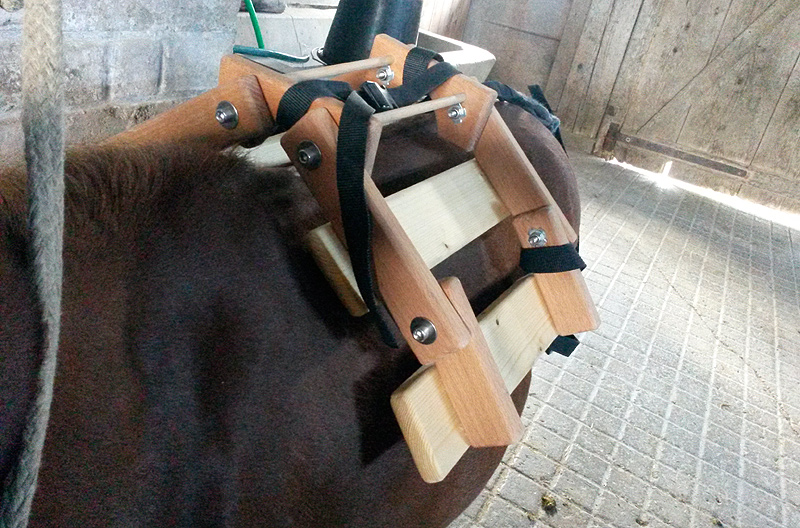
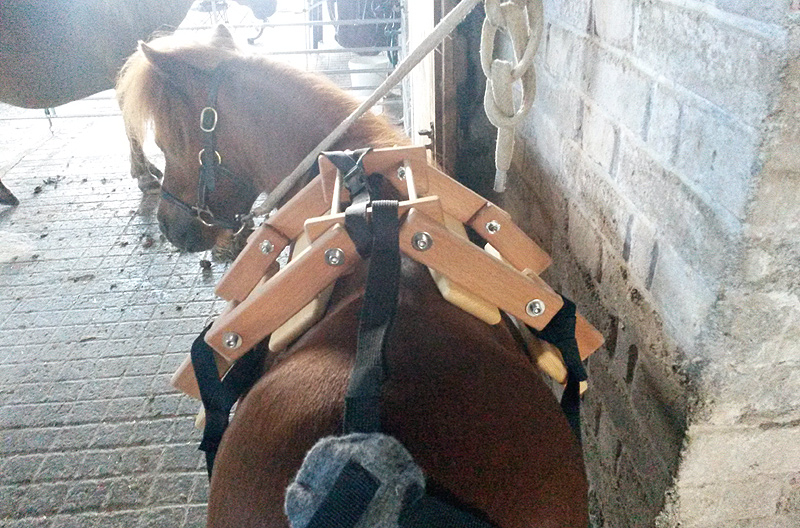
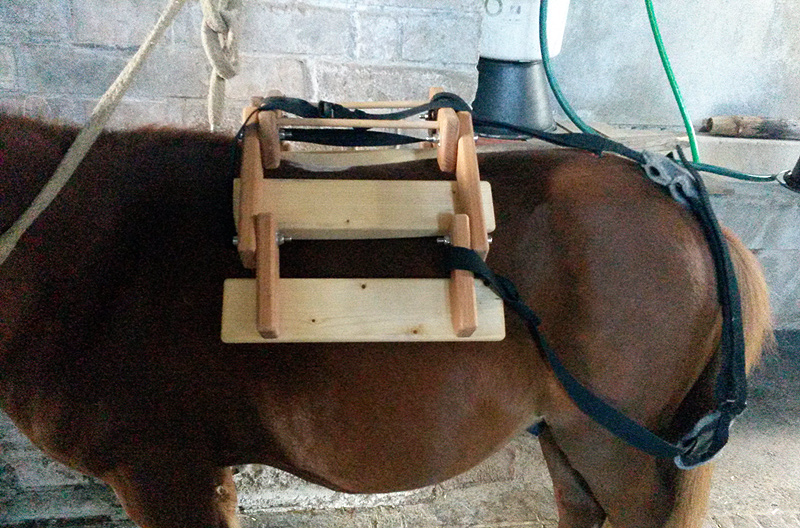
My husband made a fully adjustable wooden saddle tree after measuring the back of my pony.
20150727_191518.jpg


20150727_191524.jpg


20150727_191531.jpg


(this is the saddle tree without pads)

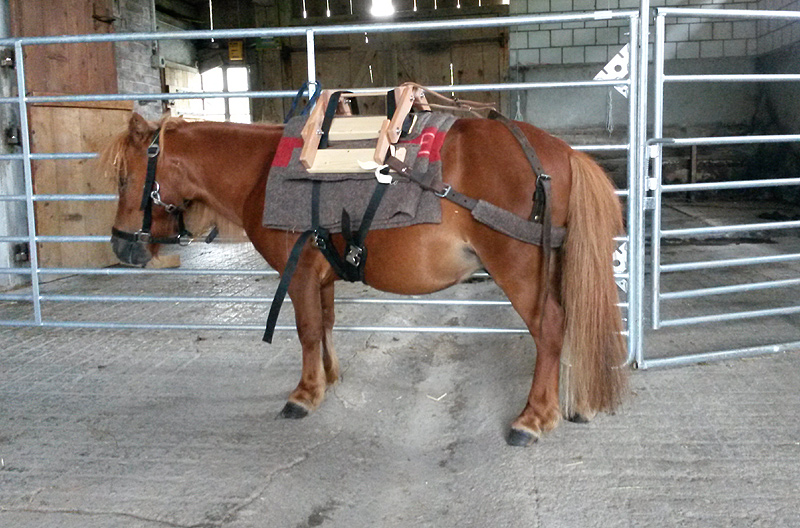
Then, I made pads for the 4 bearing surfaces. I used foam material and wool case.
20150801_152602.jpg


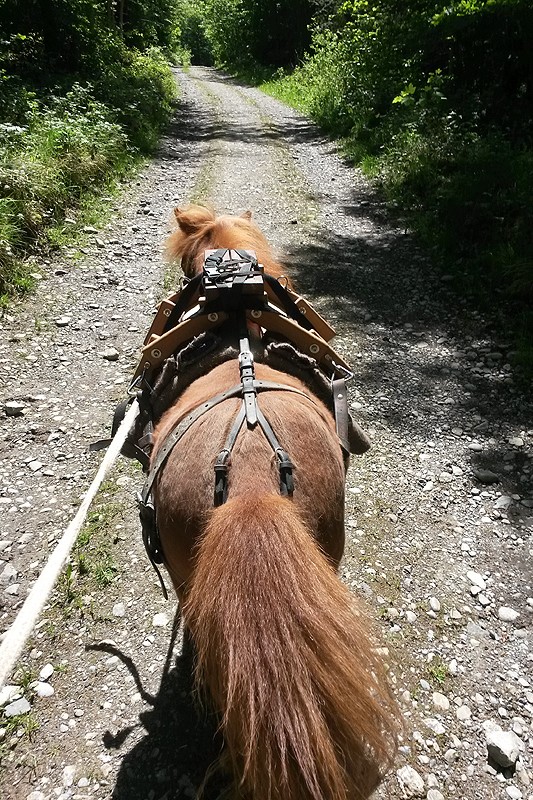
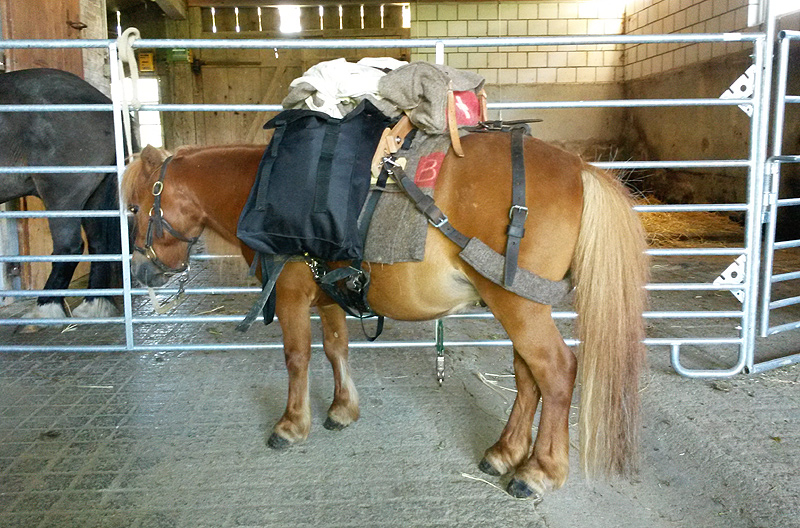
Later, I improved the breeching by adding a crupper. There was never a front harness necessary, even when we had to climb.
20150821_154151.jpg


The saddlebags are normal saddlebags made for riders. I just customized them a little bit.
 
Last edited by a moderator:
Very ingenious! I am very surprised it didn't require a breast collar. Did you do your own leatherwork?

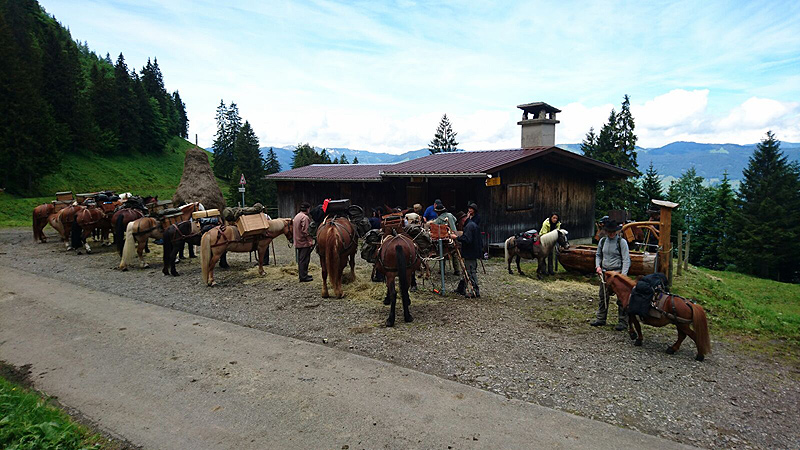
It shows a great understanding of packing, too. What a great group photo!
 
Last edited by a moderator:
Thanks Marsha
default_smile.png
Yes, I did my own leatherwork, but I worked with screws, no sewing.

Breastcollars are often only for a historical purpose, as an example the army pack saddle always had a breastcollar that a horse can be hitched to a cart or pull material like trees. Most of the horses, a workshop leader told me, don't need the breastcollar if the saddle fits well. In the opposite, the breeching is very important in high mountains. We always had short breaks before going downhill to tighten the breechings. And loosen the breeching again as soon as the downhill path ended. So I tightened and loosed the breeching many, many times a day. Thats why the breeching belt is half-opened all the time.
 
Thank you for sharing! I'm a goat packer myself who recently fell in love with mini's, so much so that I brought a filly home yesterday. I have hope that my filly will enjoy trails enough to fit her with a saddle someday.
 
I am studying your photos closely to make my own. Why and how did you decide you need the lower pair of side boards? It doesn't look like they make full contact with the pony.

Is there anything you would change about the design now that you've put it to use?

How much do you think this pack saddle weighs?

And what are the dimensions and type of lumber?
 
Sorry, I know I've promised to make a tutorial and I haven't had time enough to do it yet... I'll deliver it soon with detailled informations and pictures.

The lower sideboards are carrying maybe 25-35 percent of the whole weight, they are important for this type of saddle tree for the ideal weight disposing. The lower sideboards should be adjustable, this is necessary because the horses dimensions can vary from day to day. I had to adjust the lower boards 2-4 times in a week on our tours. Not the main saddle boards, I had to adjust them one time in a couple of months and the back of the horse did not changed lot.

I wouldn't change anything on the saddle, if I would build another, it would be the same
default_smile.png


I made a first draft out of a cardboard before I started to build the saddle. I would recommend to do this to figure out the horses exact dimensions. The most important thing are the correct board dimensions and positions. I'll make a sketch. You can also check out this link https://schleese.com/2016/02/29/saddle-fit-and-saddle-length-how-long-is-too-long-tip-7/ <= there is an explaining how long a saddle should be. For pack saddles, it's almost the same, but I think for a small mini, it would also be ok if the boards are about an inch over the last rib (otherwise, the saddle would be too small for packing
default_smile.png
).

Lumber: we used oak for the boards and pinewood for the rest. We used tee nuts for the screws to fix the joints. I'll make detail pictures.

The weight of the saddle is about 6 pounds. Completed with all luggage the maximum was 26 pounds (my horses weight is 196 pounds). I think for longer hikes, the horse should not carry more than 15% of it's own weight.
 
Here is the first part of my tutorial:

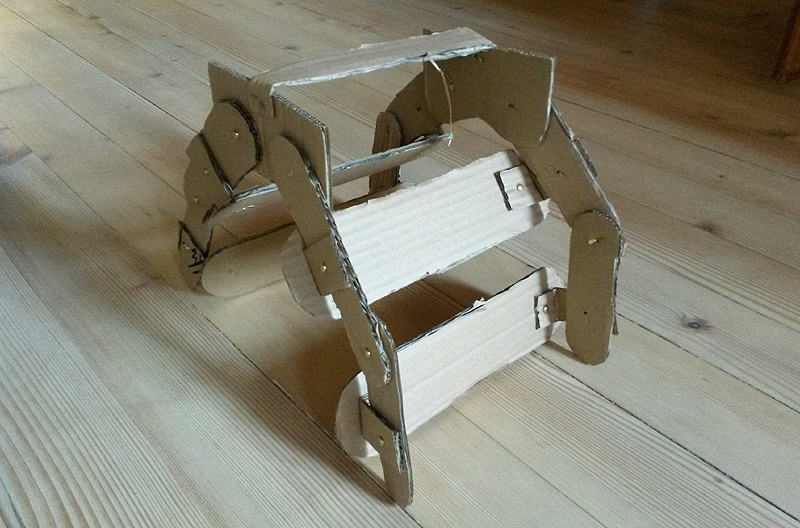
1. The Template

The very first thing you should do BEFORE you start to build the original saddle is a template. I did one out of a cardboard and I fitted it exactly to my horses back. My model for the saddle tree was the swiss army pack saddle

20150628_124502.jpg


As you can see, the saddle consists out of two pair of boards instead of one. The main board (upper) should have the same position as normal saddle trees. You can find out more about the ideal saddle position e.g. here .

The second pair of boards (lower) will be positioned at the horses costal arch. This part of the saddle will be more flexible than the upper part, because horses can loose weight very fast if you are on a longer hike. The lower board will carry not more than 1/4 to 1/3 of the total weight while the upper boards will carry the main part of the weight.

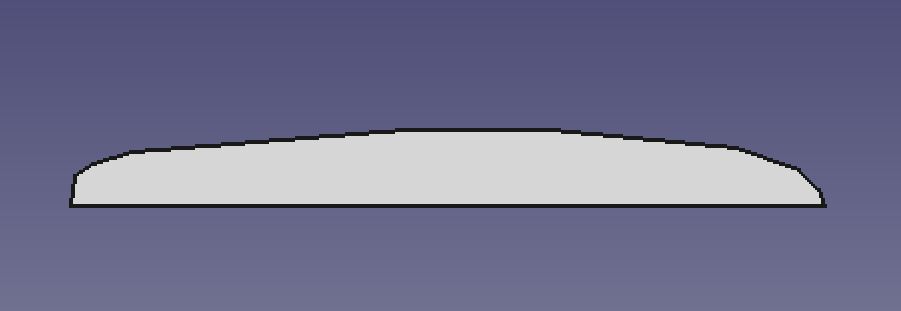
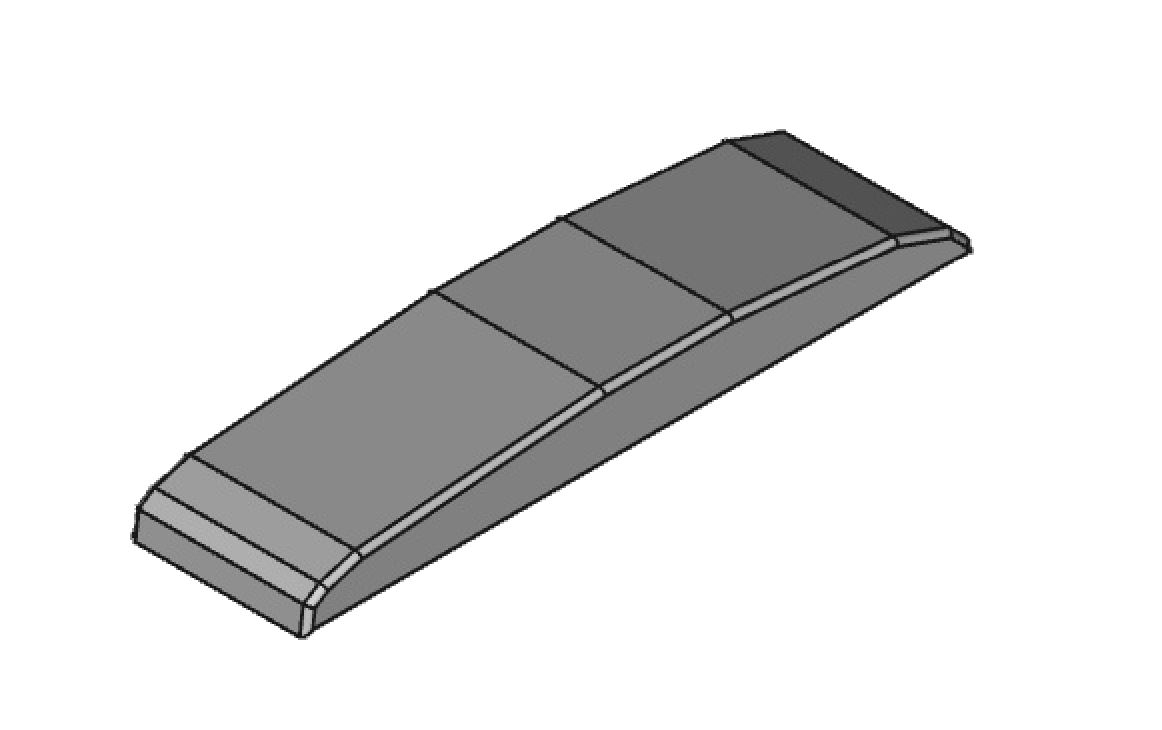
If the templates size fits well to your horse, you need a second template to find out your horse backs profile. This will be for the upper boards, they need a "saddle tree profile". I recommend to use a piece of cardboard with the same length of the boards with the following profile (depends on your horses back!):

cardboard.JPG


With these two templates finished and perfect fitting, you're ready for the next step.
 
2. The Upper Boards

The upper board is the most important and most difficult part of the saddle tree. As I explained before, it has to match perfect to your horses back, that's also why you have to create the templates.

You need now two pieces of hard wood (we took oak wood) and cut it into the dimensions of the upper boards. The height of the boards will depend on your second cardboard with the profile of the back of your horse. I recommend to not be thinner that an inch at its most weaky point.

Now, you have to shape the boards... until they look like my next sketch:

board1.JPG


It's a great idea to check up the correct profile a few times while shaping.
 
Wow! This is awesome! You and your husband were very thorough. Most people do not take so much care of their horse's comfort.

What tool did you use to shape the upper boards?

I was going to shape mine with an old hoof rasp.
 
Thanks ;)

We used a planer and a grinder to shape the boards. I think a hoof rasp would work too, but it's probably more work.

I gave you a wrong information about the wood we used before
default_sad.png
I figured out we used pine wood for the boards and oak wood for the frame. I'm so sorry about the mistake! But I think it doesn't matter that much.

3. The Lower Boards

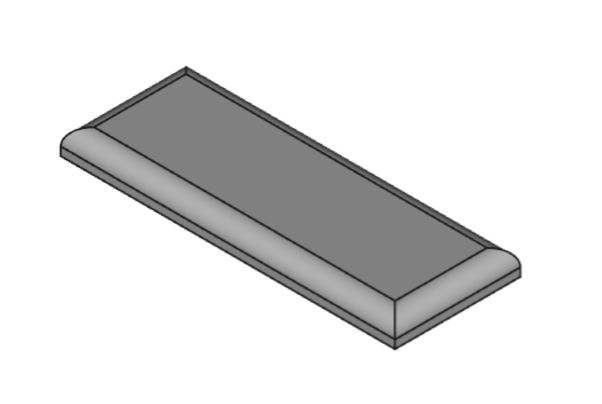
The lower boards are supporting only and should not carry more than 1/4 to 1/3 of the total weight. They are much easier to shape. Dimensions may be the same as the upper boards, but not as thick as they are.

lowerboards.JPG


4. Frame

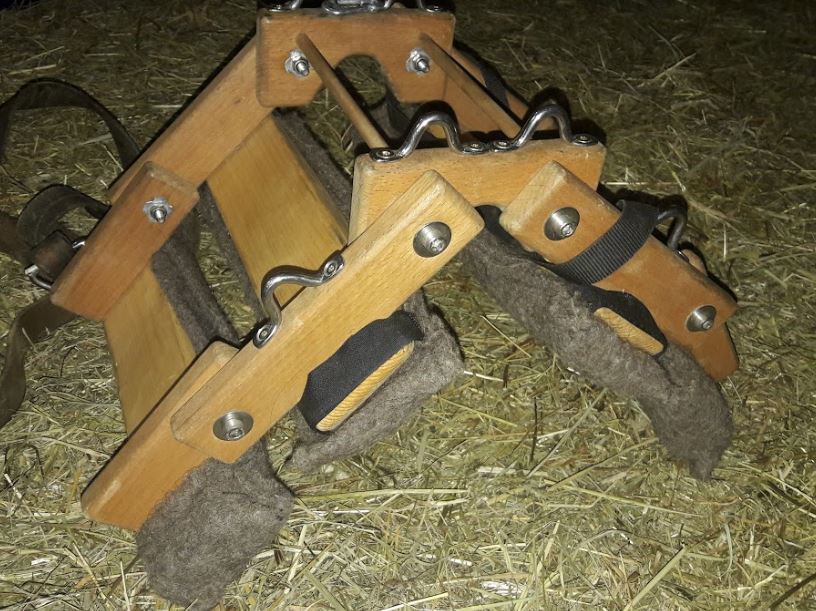
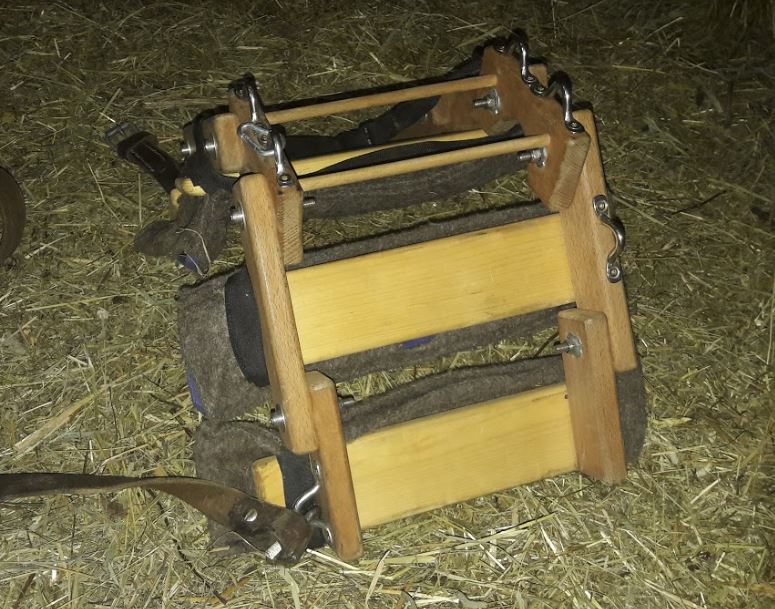
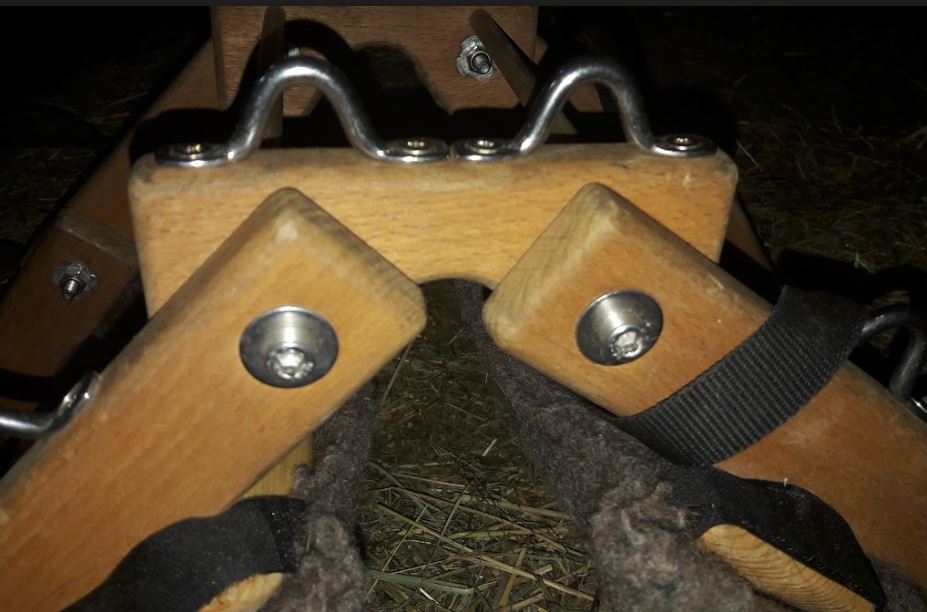
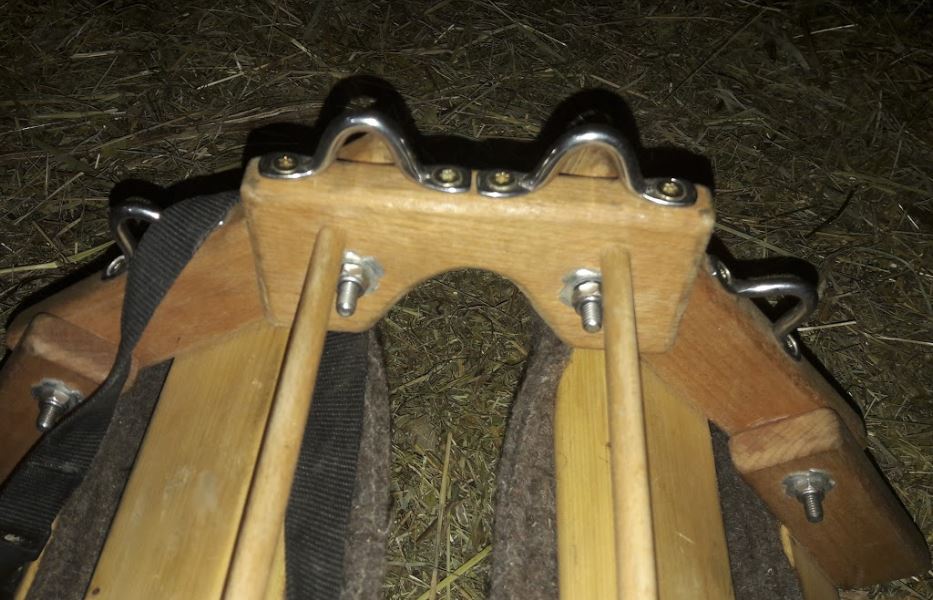
For the wooden frame who holds the boards together, you need a lot of small pieces of wood. Dimensions are depending on your template.

Look at to following pictures to figure out how they can look like.

frame1.JPG


frame2.JPG


frame-front.JPG


frame-above.JPG


Im summary you have to create:

- Two top parts with cutout for withers and spine

- Four longer parts for the upper boards

- Four shorter parts for the lower boards
 

Latest posts

Back
Top